The great chef Escoffier held eggs in high regard. There are more than one hundred egg recipes in his Guide Culinaire. It tells us, perhaps, that guests at the Savoy in the late nineteenth century or the Carlton Hotel in the early twentieth had considerably more choice than 'boiled, fried, or poached' for their breakfast eggs.
We have eaten eggs for all of recorded history, and in phenomenal numbers. In 1344 at Pope Clement VI's coronation feast, for example, 39,380 eggs were consumed in one way or another. Eggs were not, however, exclusive to the nobility. Eggs were "part of the modest everyday fare" by which historians can calculate the cost of living at any given time. (Braudel)
By the time of Escoffier, it was not unusual to be fussy about how one's eggs were cooked. Perhaps the most famous "fusser" was the English novelist, Arnold Bennett, a long-time resident at the Savoy Hotel. He reputedly influenced Escoffier and/or the chefs at the Savoy to create the omelette, and henceforth he demanded this omelette for breakfast wherever he travelled, popularising the dish.
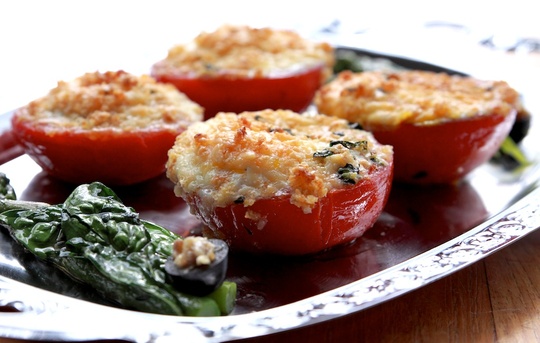
Eggs Maximilienne is another classic Escoffier egg dish which may have tempted even Arnold Bennett to temporarily forgo his omelette.
Ingredients:
2 large tomatoes
4 small eggs
1-2 cloves chopped garlic (to individual taste)
2 tbl continental parsley
2 tbl breadcrumbs
60g grated Parmesan
olive oil for frying
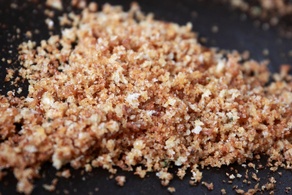 Pre-heat your oven to 200 degrees Celcius. Slice the tomatoes in half horizontally and remove the innards so that you have a tomato cup. Fry them in the olive oil just long enough to give them a little colour. Place them on an oven tray and fry the breadcrumbs.
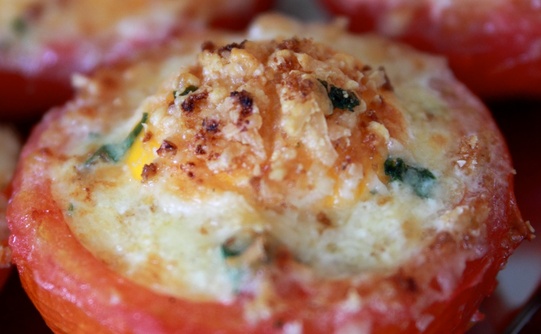
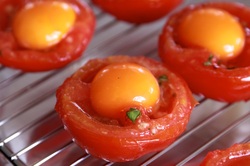 Mix the garlic and half the parsley, and sprinkle into the tomato cups. Break an egg into each cup. (If you're worried about the egg spilling or the tomatoes losing shape, you can fashion a foil belt around each cup.)
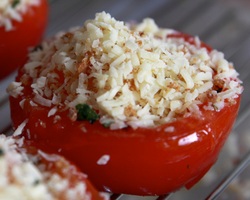
Add the Parmesan and breadcrumbs to the remaining parsley, then sprinkle on top of the eggs.
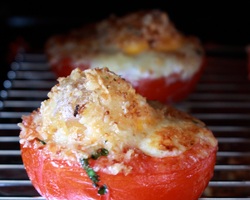
Bake for eight to ten minutes, and warm up your grill. Transfer to the grill until the cheese browns and bubbles up (au gratin).
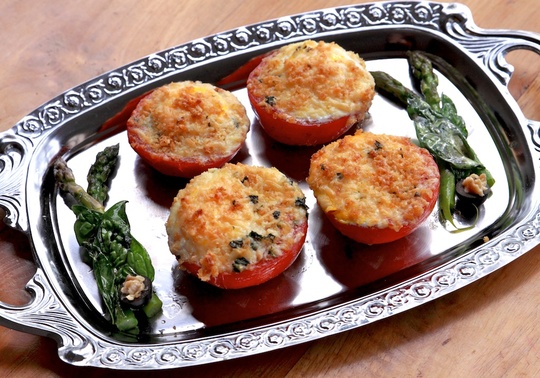
Serve immediately.
If you have mushrooms as well as leftover garlic, Parmesan, and breadcrumbs, we highly recommend making mushroom cups alongside the Eggs Maximilienne. We placed a sliver of butter, garlic, and a squeeze of lemon in each upturned mushroom cup, then topped each with a mix of Parmesan and breadcrumbs.
Eggs Maximilienne could also be topped with candied bacon, or the parsley substituted with basil. This dish is fairly rich on its own, but it could be made into a larger meal with a small accompaniment of meat and vegetables, such as fried slivers of black pudding or crispy bacon and asparagus spears or baby spinach.
Finally, many thanks to Patricia at Artitude for the kind gift of duck and chicken eggs, some of which were used in the making of our Eggs Maximilienne.
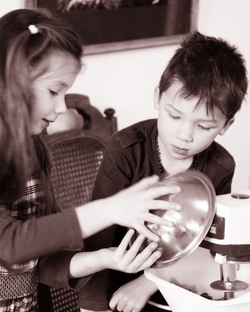
This is the first of our recipes for children. Whether you're a home educating parent, a doting uncle or aunt who wants to do some baking with the littl'uns, or just feeling a tad lazy, this is a recipe for you.
 Ruth Graves Wakefield Ruth Graves Wakefield
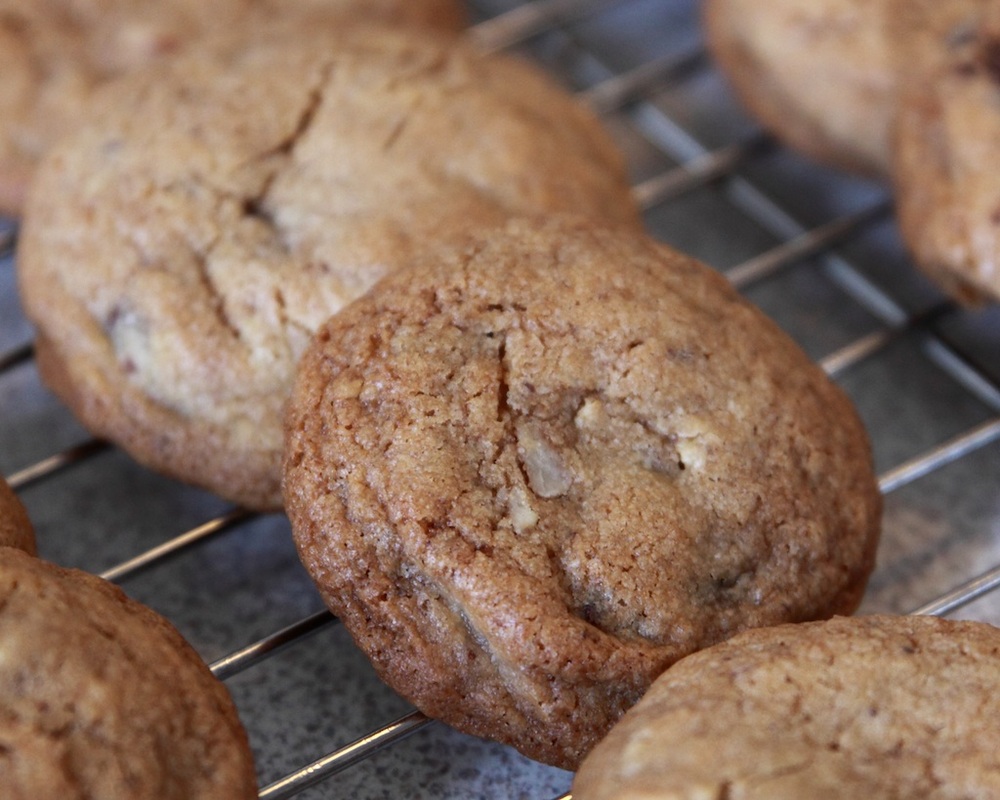
The Toll House Cookie is better known around the world as the chocolate chip cookie. The details are a matter of dispute, but what is beyond reasonable doubt is that Ruth Graves Wakefield of the Toll House Inn in Whitman, Massachusetts, invented them in 1930 using broken-up Nestlé chocolate bars. The cookies became so popular that Wakefield sold the recipe to Nestlé in exchange for a lifetime's supply of chocolate. Nestlé invented the chocolate morsel so home cooks wouldn't have to break up their chocolate bars, and the rest (as they say) is history.
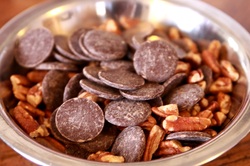 The method we're using today harks back to its invention. We're using Nestlé dark chocolate buttons so that they can break up in the mixer the way the chocolate in the very first Toll House Cookie would have. If you don't have a stand mixer, you may prefer to use chocolate chips.
| Ingredients:
250g unsalted butter
170g brown sugar
170g castor sugar
200g chocolate buttons
130g pecans
|
2 eggs
1 tsp baking soda
pinch salt
350g flour
| 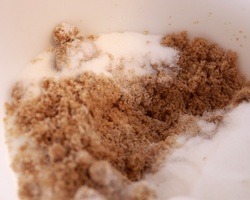 If you're cooking with children, the first thing to do is get organised. (If you're not, it doesn't hurt to be methodical.) First, put the two sugars in your mixing bowl. Secondly, dice your butter. Thirdly, put the nuts and chocolate in one bowl; and mix the flour, salt, and soda in another. If your children are fairly young, we suggest you use bowls you can't break.

Add the butter to the sugar, and mix using the paddle attachment. Don't 'cream' them unless you want a very thin cookie. Limiting the mixing stops them spreading too much and becoming one flat mass of conjoined cookies.
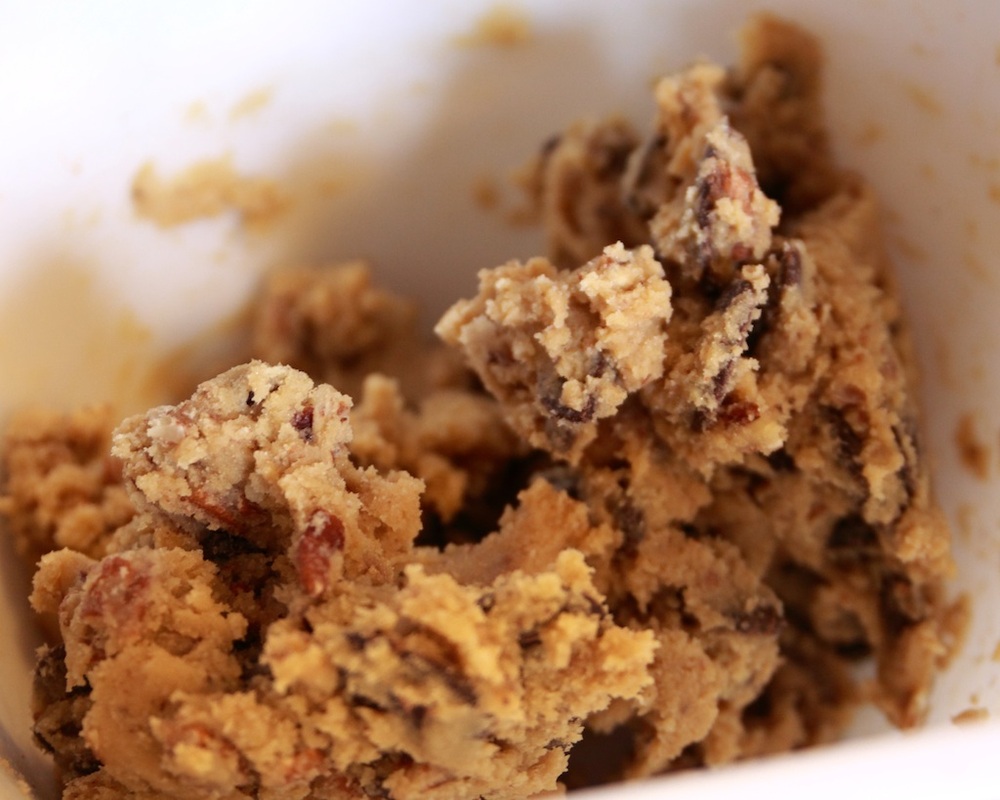
Next, add the chocolate and nuts. This is where we replicate the process by which the first chocolate chip cookie was made. According to legend, the vibrations of a Hobart mixer knocked some Nestlé chocolate bars off a storage shelf into the cookie dough. Mix them in so that the chocolate and nuts break up a little.
Now you can add the eggs, then the flour mixture, approximately one-third at a time. (Pulse your mixer rather than just turning it on if you don't want a mess.)
Handy Tip: If you want to break eggs in one hand like a pro, make sure you crack them on a flat surface (not an edge) so that you don't end up with broken bits of shell in your cooking.
You could put the paddle and bowl in the sink to be washed, but we don't like to waste a single crumb, so feel free to lick it as long as your eggs are safe to eat raw. (The key to safe eggs is to wash their shells.)
Pre-heat your oven to 210 degrees Celcius. (Any temperature between 200 and 220 should be fine.)
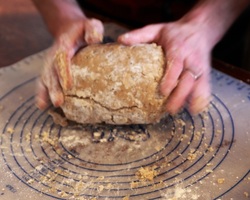
At this point, turn out you dough onto a clean surface dusted with flour and knead sufficiently for it all to stick together. This is a brief process. You do not need to make it smooth.
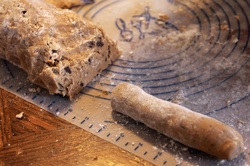
Cut off pieces and roll into logs to press out any air bubbles.
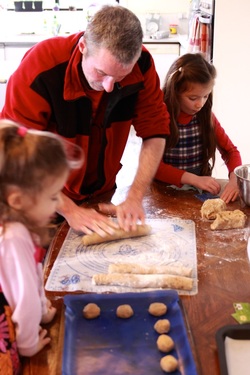
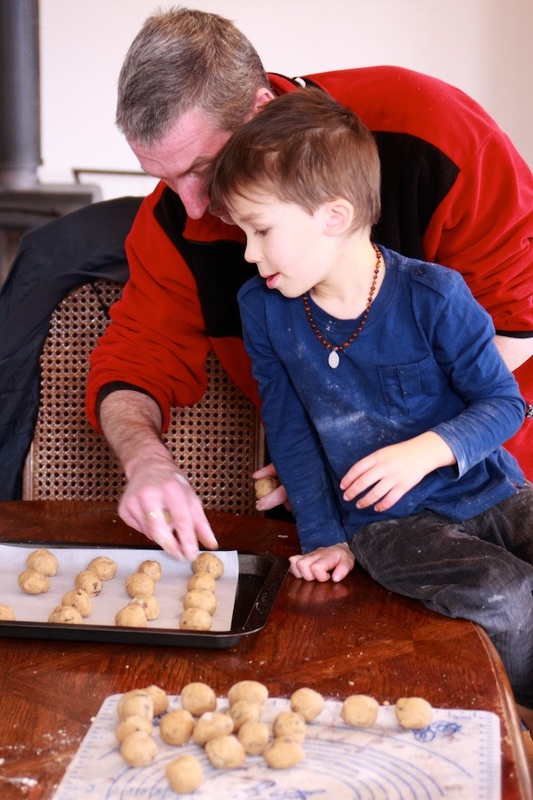
If you have little helpers, they should be able to participate fully as long as you don't use a sharp knife.
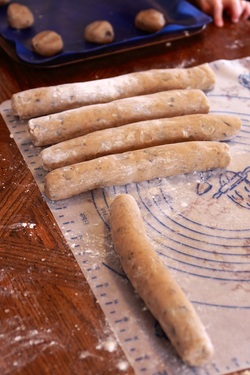
Put aside any excess logs and freeze for later.
(This recipe makes approximately 4 1/2 dozen cookies, so you can put some aside if you're feeling penitential, but we don't recommend it.)
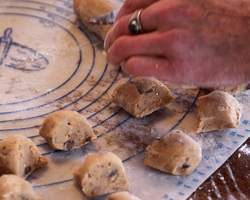
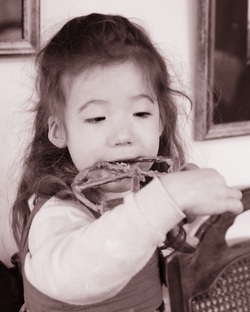
Cut your logs into small sections so that your little helpers can roll them (just like play dough) into little balls. It's important to make them even in size. As a guide, ours were approximately 20g in weight and 3-4cms in diameter.
Make sure you space your cookies so that they cook evenly. You can flatten them slightly with a fork if you prefer, but it's not necessary. The cookies will spread by themselves in the oven.
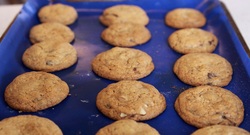
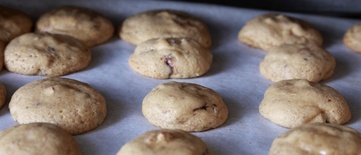
Bake until they are golden brown (approx. 15 minutes).
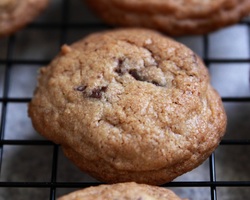
Allow the cookies to cool down a little on a wire rack before eating. You don't want to burn your tongue!
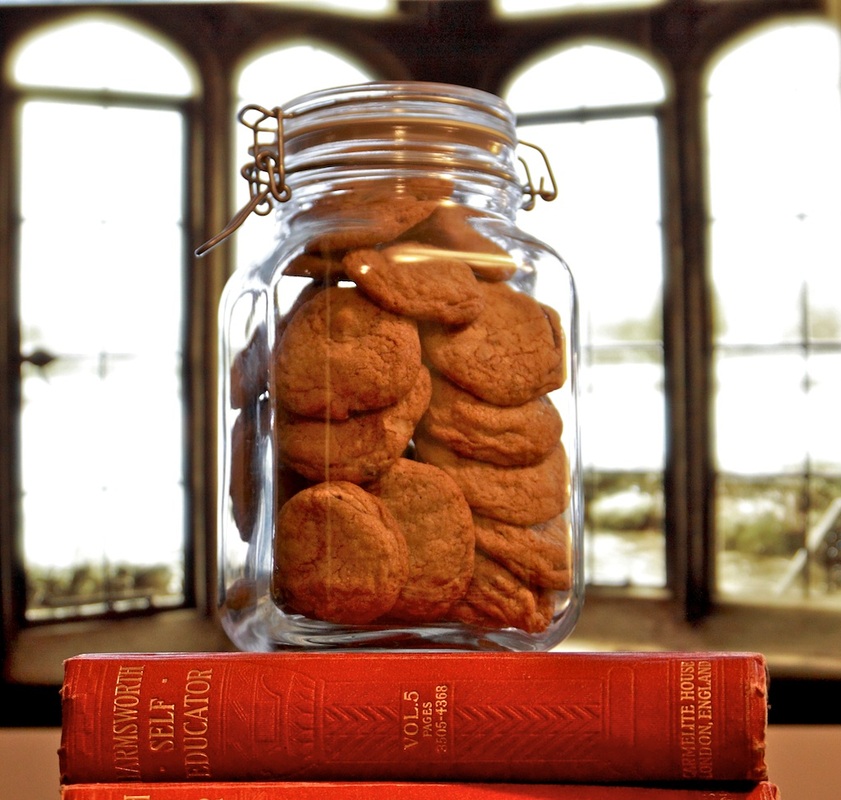
You should now have enough cookies to fill a couple of cookie jars.
If you are using this recipe as a lesson for your children, you could do various activities relating to the history of toll houses and turnpikes. At the very least, it's great fun getting out a map and finding Whitman, Massachusetts, the original home of the world-famous Toll House Cookie.
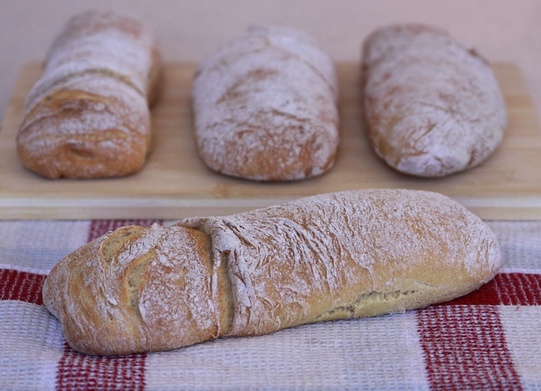
Ciabatta, which means slipper in Italian, has a hotly-disputed history. It is generally marketed as a traditional bread, the sort of bread one might have consumed along with a tankard of mead in an alehouse in the Middle Ages. However, a miller called Arnaldo Cavallari claims to have invented it in 1982 to save Italy from skyrocketing baguette imports from France. If he did, it was a stroke of genius. Ciabatta has become the bread of choice in trendy cafés, restaurants, and sandwich shops the world over. With a high water content (80%), it's an inexpensive bread to produce, and yet it is often double the price of other breads.
It is delightfully ironic to be baking a bread that fended off an invasion of French baguettes to accompany our Veal Marengo recipe celebrating a French Napoleonic victory in Italy, but the main reason we've chosen to feature the ciabatta is that it's a bread that's particularly pleasing to the senses. It isn't just tasty. It tears beautifully in the hands, alternates between a crunchy crust and soft springy centre, and gives off the most wonderful aroma in the oven. And then there's the texture. The loaves are a work of art, never identical, a joy to touch.
Some say it isn't a bread for novice bakers, but we beg to differ. As long as you are not impatient and keep the dough wet, this is an easy bread to make.
Ingredients:
700g strong (high gluten bread/pizza) flour
20g dry yeast
20g salt
pinch of castor sugar
1 tbl white vinegar (or sourdough starter)
560ml tepid water
20ml olive oil
olive oil spray (optional)
flour for dusting, preferably rye
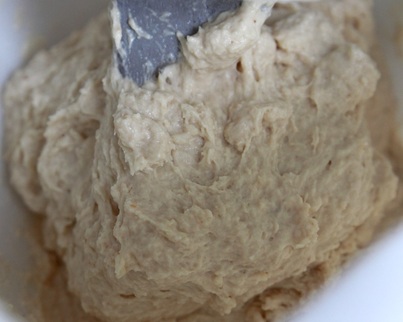 Begin by weighing and mixing all the dry ingredients. It's important to weigh these as the amount can vary so much if you use a cup measure depending on how densely the flour is packed. Add the flour mixture to 500ml of the tepid water and a splash of vinegar (c. 1 tbl) in the bowl of your stand mixer. (If you don't have a stand mixer, be prepared for quite a workout.) Mix on slow speed using a dough hook, adding the rest of the water as needed so that you have a very wet and sticky dough.
Mix on a higher speed for ten to fifteen minutes until the dough sticks with a cobweb-like consistency, then add the olive oil and continue mixing for a minute or two.
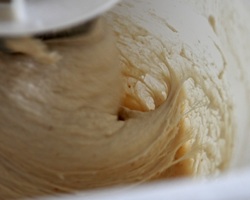
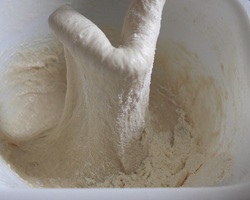 By this time, the dough should be supple and stretchy and have a high sheen. Add a small handful of flour and continue to mix on high speed.
 The dough should come away from the bowl - add a little more flour if it doesn't.
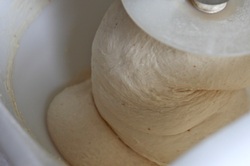
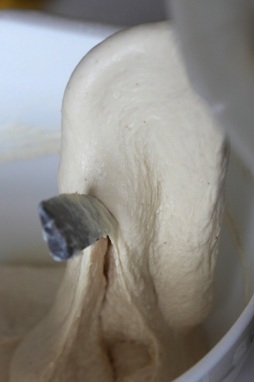 The dough will now be supple, shiny, smooth, and stretch easily.
Let it rise for approximately two hours in the bowl, covered with cling wrap or a plastic bag. It should more than double, even triple in size.
Pre-heat your oven to 230 degrees Celcius or thereabouts.
After your dough has risen, give it a generous spray of olive oil and knock it back. (This prevents it sticking to you or the dough scraper.) Then sift rye flour over the top.
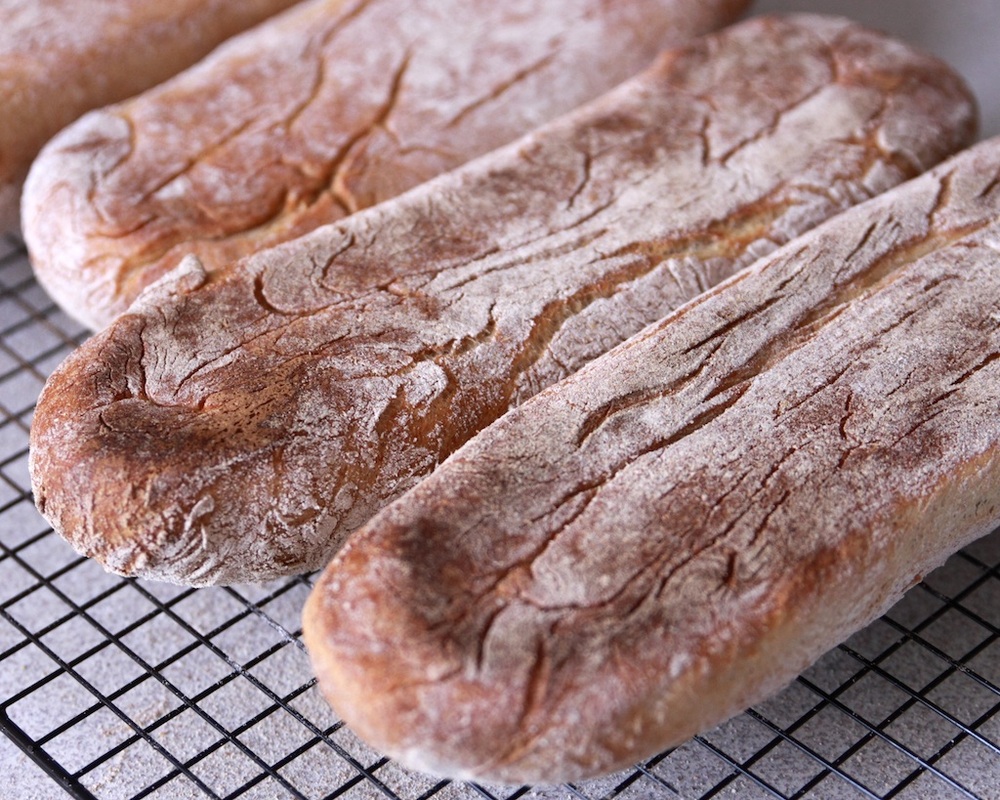
Pour your dough on to a (rye) floured bench top or board, and sift more rye flour over the top. Gently shape your dough into a rough rectangle, pushing the flour against the sides of the dough with your scraper so that the dough is encased in flour and doesn't stick. You should be able to lift up the edges, feel the springiness, and pull the dough into shape. Cut the dough into two large or four small loaves, once again shaping them using your dough scraper, this time into slipper shapes.
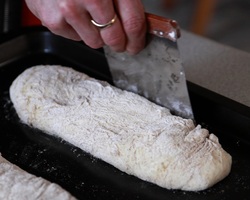 Place your 'slippers' on a baking tray (or trays) and gently push them back into shape if necessary.
Bake for 45 minutes with a pan of boiling water in the bottom of the oven to produce steam (though this isn't mandatory). The loaves pictured did not use the steam 'trick' but some swear by it.
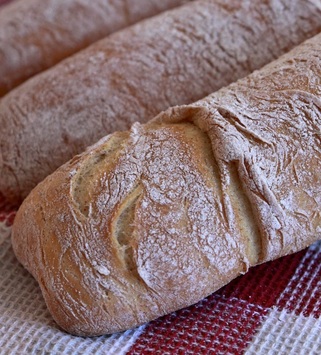 Cool the loaves on wire racks.
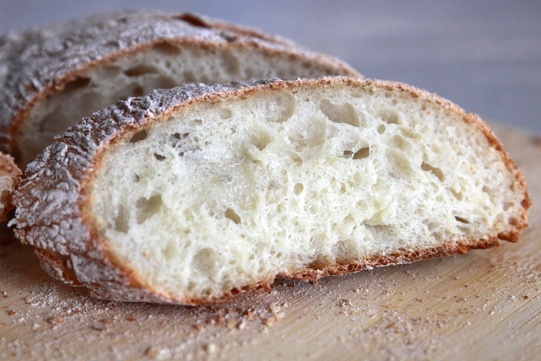
Ciabatta is so delicious that it can be eaten straight. Its flavour is best appreciated with olive oil or unsalted butter.
Whether you use your ciabatta for a fancy lunch sandwich, to soak up a rich sauce, or as an accompaniment with olive oil and balsamic vinegar, your guests will think it came from one of the finest bakeries of the region.
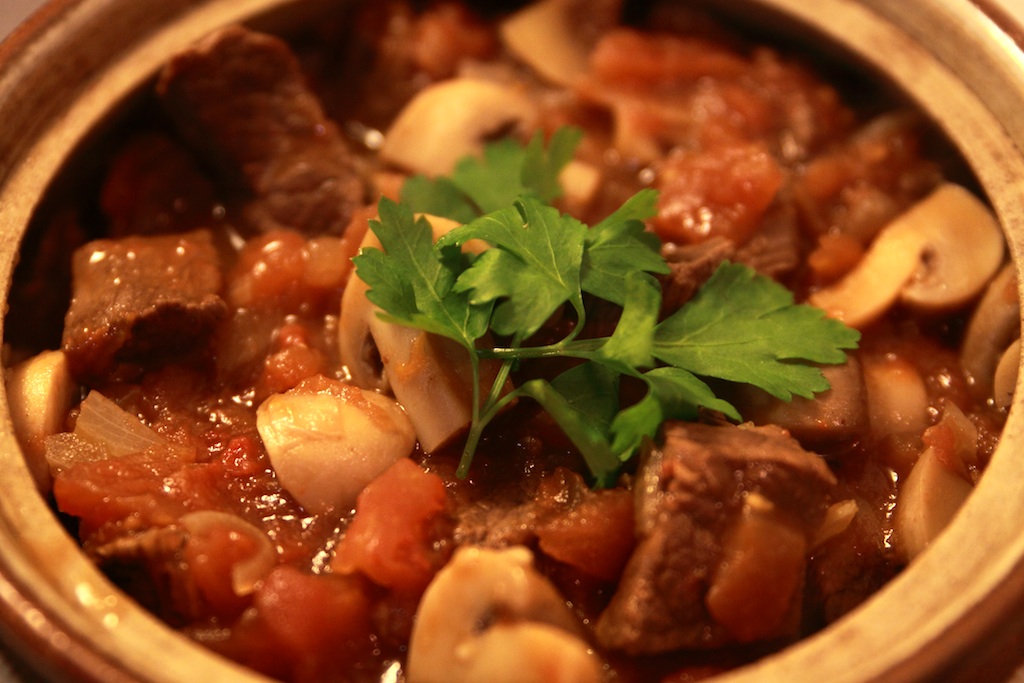
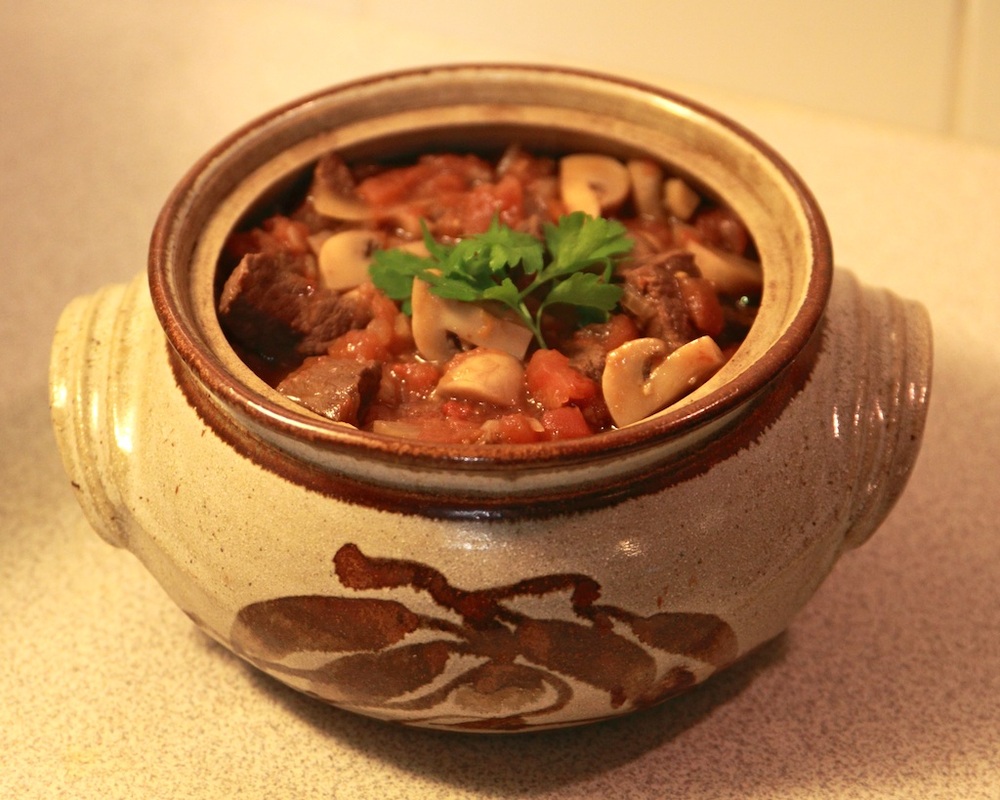
Veal Marengo isn't a fancy dish, but it's simple, easy to adapt, and can be prepared in the morning to be left in the slow cooker all day. It's a hearty and rustic recipe, yet not at all pedestrian. Even the great chef Georges-Auguste Escoffier liked it, and it's his recipe that we're using today.
Despite the Italian name, Veal Marengo has always been a French recipe. On June 14, 1800, Napoleon and his forces drove the Austrians out of Italy at the Battle of Marengo. (The opera Tosca is set in Rome a few days after the battle when the news reaches the populace of Napoleon's victory.) According to legend, Napoleon ordered dinner to celebrate. He was told there was very little in the way of food. In turn, he responded that a good chef can make something out of nothing. This is the reason for the recipe's simplicity. The chef assembled veal, tomatoes, wine, and mushrooms... and made something out of nothing.
This stew, fit for an emperor, is an ideal foundation recipe. Once you master this - and it's not difficult - you should have the confidence to make stews from whatever ingredients you can find.
Basic Ingredients:
1.5kg stewing veal (or other meat), cut into small pieces
olive oil or lard for browning
125g onion, finely chopped
2 cloves garlic, crushed
1 litre beef stock
1.5kg tomatoes
24 button mushrooms (or equivalent)
250ml white wine
bouquet garni
salt and pepper
Serves 8
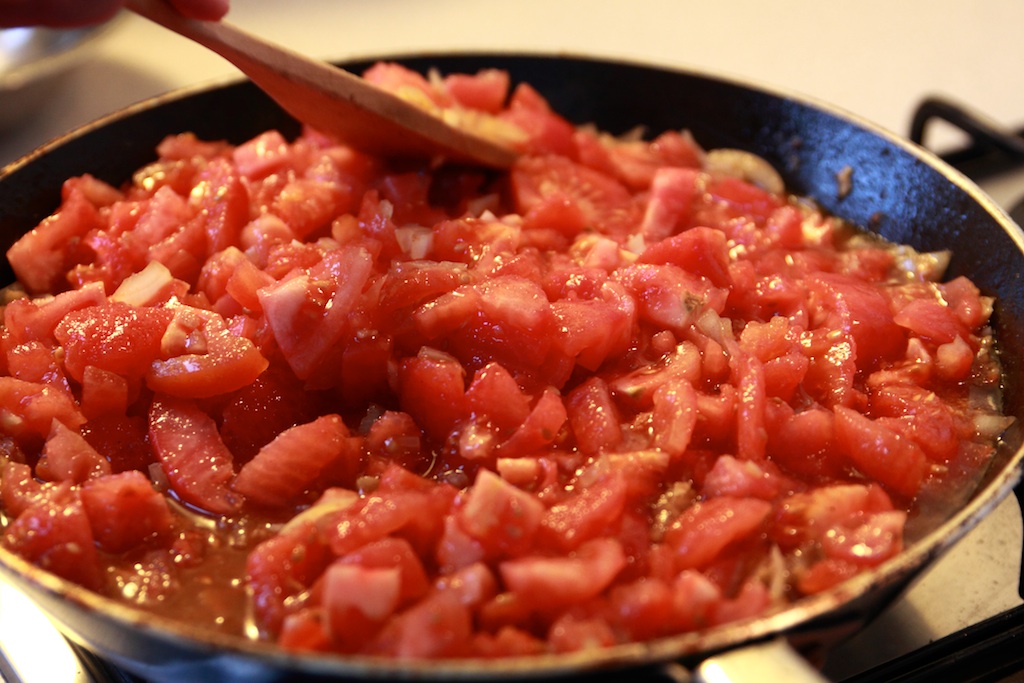
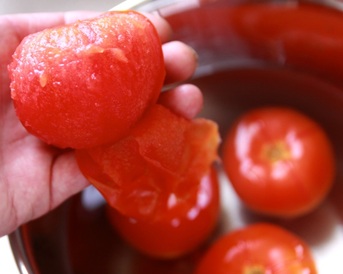 The first step is to prepare your tomatoes (if you're not using tinned ones). You should not feel guilty about using tinned tomatoes, but it's good to know how to prepare fresh ones, and we're pretty sure Napoleon's chef would have used fresh ones in the middle of an Italian summer.
Cut a cross in the top of each tomato, plunge them in boiling water for 10-20 seconds, then into cold water before peeling. Remove the stems, dice, and set aside.
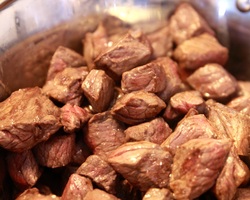
Next, brown your meat in a frying pan and remove to your casserole dish or slow cooker.
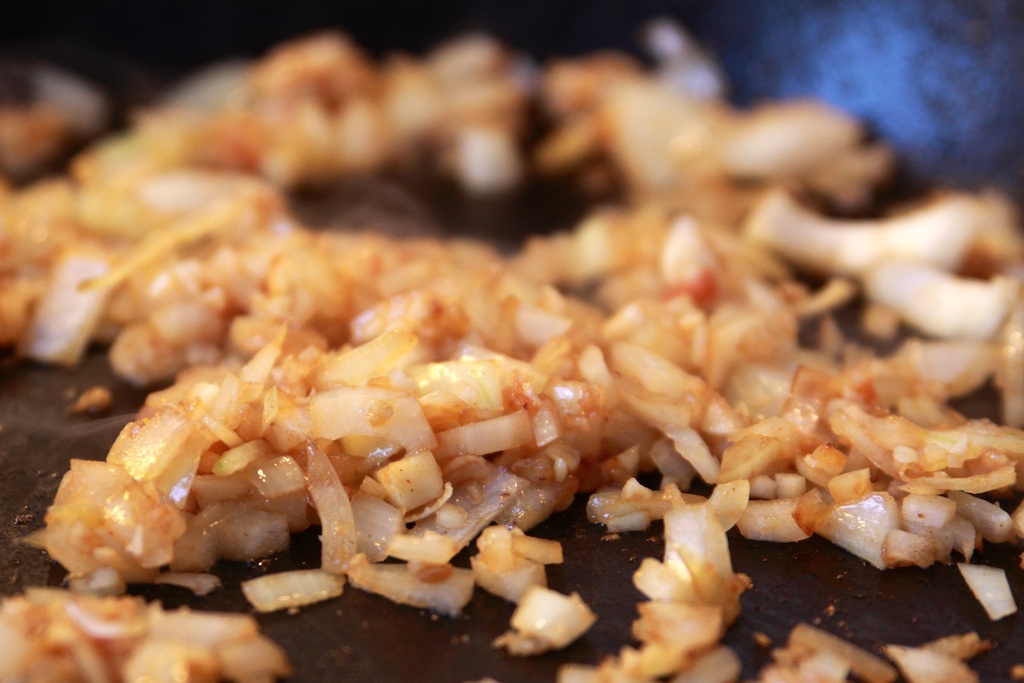
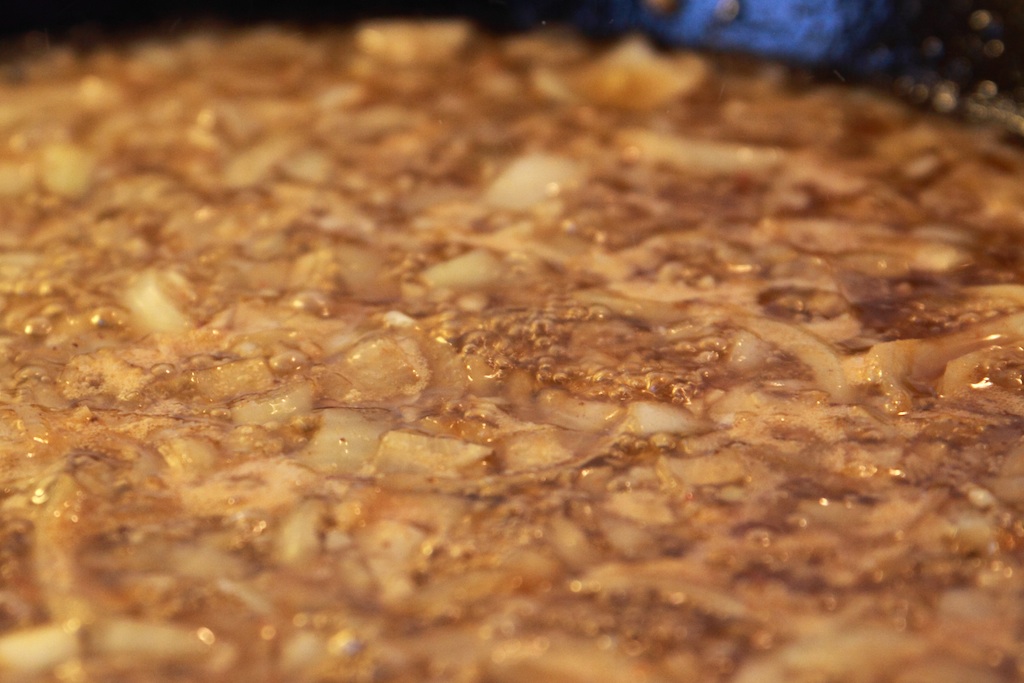
Brown the onions and garlic, then add the wine. Allow it to simmer and reduce until you can no longer taste the alcohol and the sweet onion flavour is predominant. Season with salt and pepper according to your personal taste.
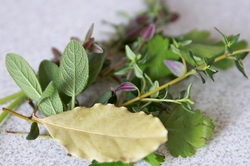
Add a bouquet garni of your choice. We recommend parsley, sage, thyme, basil, and a bay leaf. (You can use dried herbs if you prefer.)
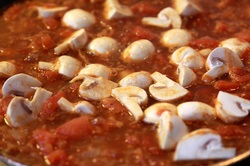 If it's looking rather crowded in the pan, put half the stock and half the mushrooms into the casserole with the beef. Put the remaining stock and mushrooms in the frying pan.
Cook for another five minutes and adjust the seasoning before transferring to the casserole. Cooking time is a minimum of 90 minutes in a moderate (160 degrees Celcius) oven, and should be lengthened according to your schedule. This dish, like any stew, is best cooked slowly at a lower temperature over six to eight hours, e.g. in a slow cooker, stored in the refrigerator or freezer, then re-heated.

If you are serving this at a dinner party, remove the meat and vegetables into a pan and strain in the sauce. Otherwise, just put as much as you wish to serve in a pan and simmer to reduce it (for approximately fifteen minutes) before serving.
Variations:
Veal Marengo can be adapted as much or as little as you like. The only limit is your imagination. There is no doubt a point at which it will stop resembling Veal Marengo, of course, and become something else entirely... which isn't necessarily a bad thing. You may wish to rename your stew by that point, though.
The meat you use can be chosen according to your personal taste and what's available or affordable. Your Veal Marengo may be Beef Marengo in winter and Chicken Marengo in summer, for example. The wine you use may also be altered. Meats with a fuller flavour, especially game should have a wine with more body. You may even wish to use red wine with your veal to give it a richer taste. Conversely, onions can be replaced with leeks or shallots for a lighter stew in summer, and exotic mushrooms used instead of ordinary ones. The herbs you select for your bouquet garni will also give your Veal Marengo a personal touch.
Vegetables can be added to the casserole itself or served as accompaniment. We decided to make it a rustic supper accompanied by ciabatta (slipper bread) fresh from the oven which we used to soak up the delicious sauce. See our next post to learn how to make your own ciabatta loaves.
Our last recipe, the Nougat de Tours, left us with some spare sweet pastry dough. Given that this often happens when making pastry, we thought we'd show you how to transform it quickly and easily into Shortbread Spirals. Popular with adults and children alike, you're not likely to have to worry about even putting them away, let alone them going off.
The only additional ingredients you'll need are: a couple of tablespoons of cocoa, a sprinkling of castor sugar, and an egg white (or water if you've run out).
 Take your leftover dough and split it in half. Flatten one of them a little, add one to two tablespoons of cocoa, fold your dough over it to keep the cocoa from going everywhere, and knead it in. This is something you can even let children do. It's just like play dough, except tastier!
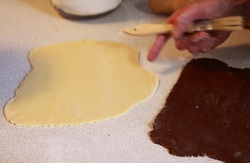 Roll out both halves so that they're roughly the same size. Brush the plain pastry with egg white (or water) and place the chocolate one on top. Smooth it out so there are no air bubbles. Brush the top again with egg white. (This is so your spiral sticks together.)
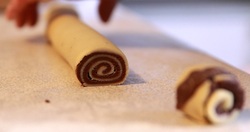
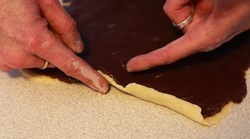 Lift the pastry and create a rounded edge to begin your spiral.
 Then roll the pastry together, taking care to eliminate air bubbles as best you can. It's no big deal if you don't get rid of them all - we had a few! - as long as you don't mind a few small holes here and there in your spirals. In other words, try, but don't stress over it. They'll still taste good!
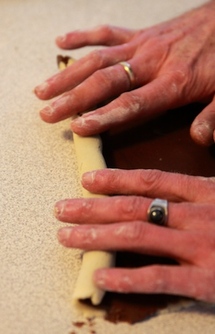
If your roll threatens to fall apart or lose its shape, unroll and brush again with egg white.
 Run your hand over the roll and feel for bumps (air bubbles). See if you can gently squeeze them out. Then coat your spiral roll in castor sugar.
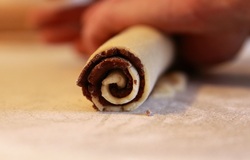
 Cut off the ends as cook's privileges and reserve on the baking tray for "testing".
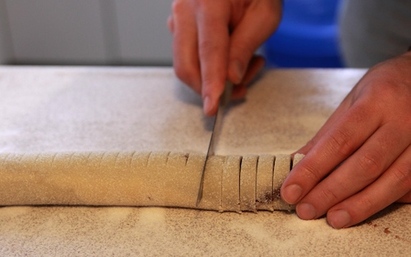 Cut your spiral roll into slices no thicker than one centimetre....
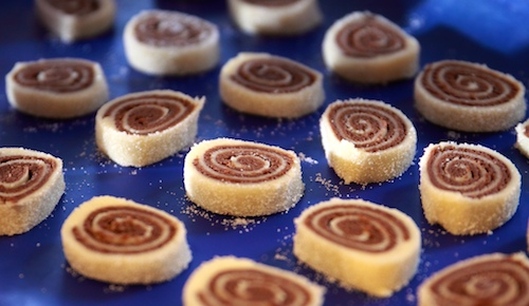 ...then arrange them on a lined baking tray with at least an inch between them. Bake in a 180-200 degree oven for approximately ten minutes. (The plain pastry should give just a hint of turning golden brown.)
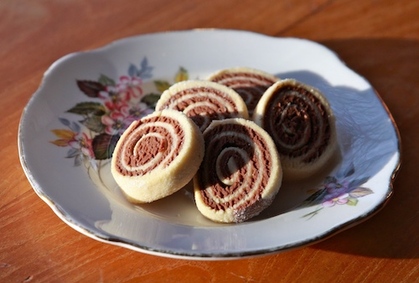 Serve as is, or half dip in melted chocolate for a special treat.
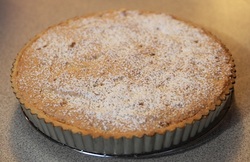
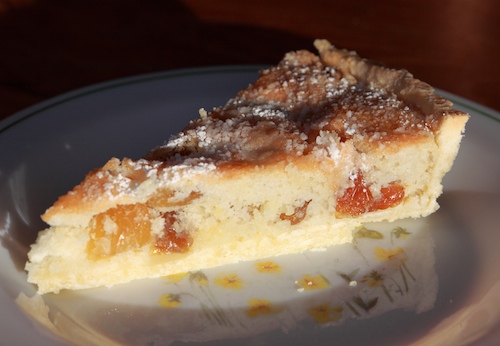
La belle cuisine is taken very seriously in France, and the Nougat de Tours is no exception. Its history goes back to at least the Renaissance, and it even has its own confraternity. But that's not the reason we've chosen it as our inaugural recipe. We just like its simplicity and versatility. There are fabulous historical associations with Tours that add to our appreciation of this delicious tart. We all enjoy the traditions associated with the Twelve Days of Christmas, and some of you may even be familiar with Michaelmas - after all, schools in the UK still refer to a Michaelmas term. There is also Martinmas, but it has fallen out of favour over the last century, mostly because of the unfortunate concurrence of Armistice Day.
"But what's Martinmas got to do with the Nougat de Tours?" you ask. Well, Martinmas is the Feast of St Martin of Tours, and Tours is one of the famous pit-stops on the historical pilgrimage route to Santiago de Compostela. And it's thanks to the legend of St Martin's cloak that we have the words chapel and chaplain. St Martin, born in Hungary, grew up in Italy and then spent the majority of his life in France. He is considered a 'spiritual bridge' across Europe. As we intend to sample the cuisine of many countries, particularly European ones, we hope the Nougat de Tours will be a 'culinary bridge' into the world of the Historian and the Chef.
Martinmas (November 11) also falls just before Advent, a penitential period heralding the celebrations and feasting of Christmas. In past times, Advent was longer and began immediately after Martinmas. Like the forty days of Lent, it was another forty day period recalling Christ's tribulation in the desert, a period of waiting for the coming of the Messiah. Eggs would have to be used up before such a period of fasting (which is one of the reasons we eat pancakes on Shrove Tuesday). This recipe calls for five eggs and is native to Tours, so it's a perfect Martinmas treat.
Like many enduring recipes, it has a fairly humble past. It can easily be regarded as merely a peasant dish using the most basic of ingredients. The beauty of such dishes is that they are what you make of them. With the slightest variations, the Nougat de Tours can be served at a fine dinner party or a rustic supper, a ladies' morning tea or a picnic in the countryside.
This is what you'll need....
A pie/flan mould. A metal one with loose bottom is easiest, but a silicone or ceramic one is fine. We used one that is 24cms in diameter at the base.
For the pastry:
115g icing sugar
175g butter
2 eggs
340g flour
25g corn flour
For the macaronade:
5 egg whites
20g castor sugar
100g almond meal
80g castor sugar
a large handful of raisins (soaked in your choice of beverage)
icing sugar for dusting
Note: These amounts will make more pastry than you need, so you can either make two tarts (double the macaronade ingredients), halve the pastry amounts, or make something extra (which we'll show you at the end as a bonus). The amounts for the macaronade are easy to manipulate using the principle of tant pour tant - equal amounts of almond meal and sugar. The corn flour isn't essential, so if you don't have any just top up with regular flour. In fact, you don't even need to make the pastry yourself - frozen pastry is fine, but there's nothing like being able to say you made it yourself. You can also use a substitute for the almonds. (Nougat comes from the word noix, French for nut or walnut.)
Your choice of beverage and fruit will strongly influence the nature of the tart. To make a delicate tart for fine dining, we recommend soaking golden raisins, cranberries, or chopped dried apricots in brandy or sherry. For a more robust taste, we soaked muscatels in coffee. You can also use mixed dried fruit or, as has become common, fruits confits (candied fruit) with a confiture. (Mishka rather likes the sophistication of a confiture of orange slices.) Your personal taste and choices, along with the way you cook and present it, will make your Nougat de Tours an expression of who you are. Once you make these choices, the recipe becomes yours. It's your Nougat de Tours.
 The Pastry
Making pastry shouldn't be stressful. Quite the opposite! It really should be a therapeutic experience. This is why we're using a basic sweet pastry recipe that you can use for any tart of your choice. It doesn't even need to be blind baked! You can jazz it up when you feel more confident, but it really isn't necessary. Simplicity has its advantages.
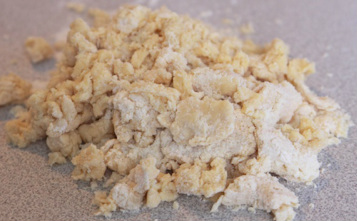
Using the paddle attachment on your stand mixer, combine the butter and icing sugar, before switching to the dough hook and adding the eggs, then the two flours. (You don't need to cream the butter and sugar - it's more like rubbing in.) Once they're roughly mixed, dump your clumps of dough on a clean bench and begin kneading. This is the therapeutic part.
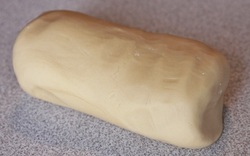
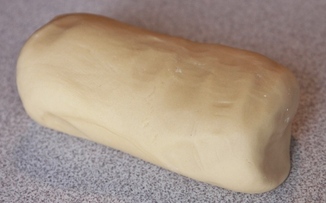 It shouldn't take long before you have a nice smooth dough which you can mould into two thick logs. If you over knead it (or are working in a very warm kitchen), it may become difficult to manage, but don't fret, just put it in the refrigerator for a short while. Put one log aside for later.
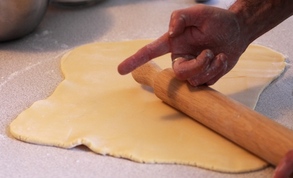 Dust your bench with some flour and roll out your log. If you do this methodically, it should come out fairly square. Roll up and down, turn ninety degrees and roll again. Then roll on the diagonals and so forth. The idea is to get a smooth and even sheet approximately half a centimetre in height. Glide your palm across the dough - caress it! - to find any bumps, and smooth them out with the rolling pin.
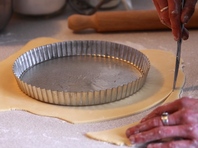 Grease your tin - we used an olive oil spray - and place it on top of the dough so that you can use it as a guide to cut your pastry into a circle. This doesn't have to be neat, just make sure you err on the side of caution so that you have enough pastry for the sides.
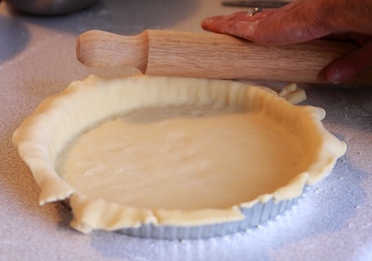 Now place your pastry inside the tin and press it in. Once that's done you can cut off the edges by simply rolling your rolling pin in an outward direction along the edge of the tin.
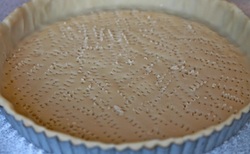 Finally, prick the base with a fork. This will stop air bubbles forming and means you won't need to do a blind bake.
 The Macaronade:
We like to begin this part of the recipe by making a cup of tea or coffee. If it's later in the day and you're making the Nougat de Tours for a dinner party, you may prefer something stronger. At the same time, soak your raisins (or other fruit) in the beverage of your choice (or hot water if you want a minimalist taste).
You should also pre-heat your oven to somewhere between 180 and 200 degrees Celcius. We chose 180 degrees for the Nougat de Tours pictured, but we found 200 degrees better for a more rustic Nougat using coffee-soaked muscatels.
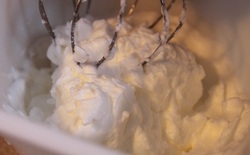
Before making the macaronade, rinse your bowl with a few teaspoons of white vinegar (to remove any fat residue). You should do this whenever whipping egg whites to ensure they work and to hasten the process.
Whip the egg whites with the 20g of castor sugar until stiff.
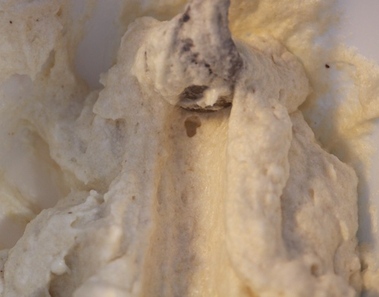 Mix the remaining castor sugar with the almond meal, then fold into the egg whites with a metal spoon.
Drain your raisins (or other fruit) and fold them in too; or, if you prefer, spread your fruit on the pastry to form a bed for the macaronade. The latter is necessary if using fruits confits with a confiture.
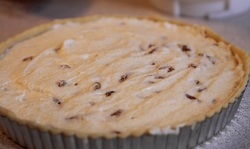 Then pour your macaronade into its pastry casing, smoothing it out gently with a spatula. If you're particularly concerned about appearances, remember that consistency and symmetry are key to not distracting from the overall beauty of your tart... and that the heat of the oven will smooth out minor flaws.
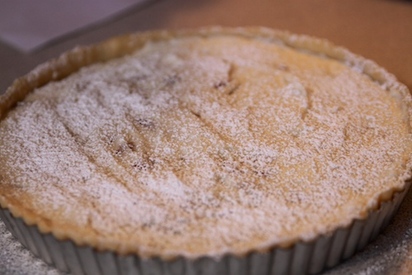 Dust your tart with icing sugar, and wait for it to sink in and dissolve.
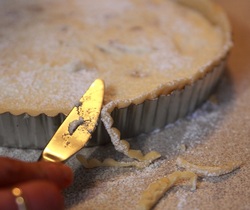 When it has done so, dust it a second time, trim the edge of the pasrty with a knife (cutting outwards), and bake for 25 to 35 minutes.
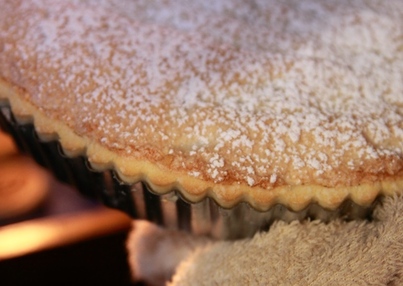 Having said that, it's best if you can form a habit of deciding for yourself when a dish is ready as ovens vary in temperature and heat distribution. You can tell if the Nougat de Tours is ready by looking at the edge. The crust should be slightly raised and turning golden brown.
 After you've taken your tart out of the oven, allow it to cool for 10-15 minutes (or completely if you wish to serve it cold) before putting it on a serving plate. If you are using a loose-bottomed pie tin, this is achieved easily by placing the whole tin on a bowl or other steady object with a smaller circumference and allowing the side frame to drop to the bench. You can then place the tart on its serving plate without damaging the sides.
Now that you've made your Nougat de Tours, there's the question of how to serve it. Softly whipped (or dolloping) cream isn't necessary, but wouldn't be inappropriate, especially if served as a dinner party dessert. Likewise, a sweet wine from the Touraine region of the Loire Valley would undoubtedly be a delightful accompaniment... but that was beyond the means of the Historian and the Chef.
Whatever character you give your Nougat de Tours, we hope we have equipped you to take this basic recipe and make it your own... and we hope we have inspired you to give all your food an individual touch.
But what about that leftover pastry dough? Read our next post to find out!
|
 RSS Feed